Most page breaks in Word will carry over when a source file is uploaded or inserted within the HTML document. Since visual features of an HTML document and a Word document are different, you may want to adjust the page breaks if you prefer the look of a traditional document.
As you update the document, you will need to add and remove page breaks.
Matching Page Breaks for Better Proofs
To see how the document looks with current page breaks, build and export a Word or PDF proof and review to see if there are pages that can contain more information, or if there are pages with too much content that runs over page breaks.
The example below shows a PDF proof with excess white space on page 8.

To improve the layout, consider one of two options to move the isolated paragraph:
- Remove the page break before the paragraph to join it with the text on page 7, or
- Remove the page break after the paragraph to combine it with the content on page 9.
The example below shows a proof that has too much content between page breaks to fit on a single PDF page.
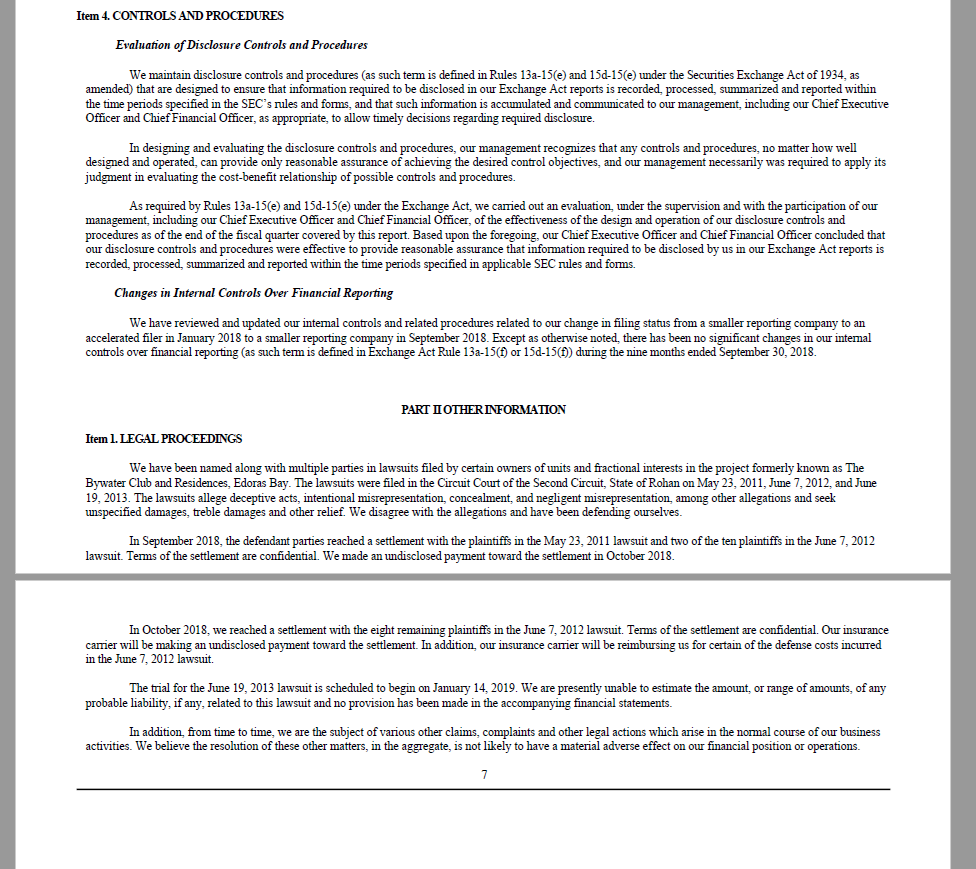
To improve the layout, add a page break above Part II. The break at page 7 can be removed altogether so the content is combined with page 8.
Note that PDF and Word proofs have different margins, so select the type of proof you’ll be exporting and format page breaks in the ThunderDome project accordingly.
Add Page Breaks
To insert a page break, place your cursor where the break should appear. Go to the insert tab, then hit the Insert Page Break button. When inserted, the page break will include a space above and below by default.
After adding page breaks, press Save or use the Update Page Numbering button to automatically renumber pages, add headers or footers, and update the table of contents page references.
Remove Page Breaks
To remove a page break, select the area containing the page break(s) and use the Remove Page Break button. Be sure to confirm the number of page breaks before removing. If you do not select any page breaks before removing, then all page breaks will be removed.
Another simple way to remove a single page break is to put your cursor below the turquoise block that indicates a page break. Press Backspace on your keyboard until the turquoise blocks are removed.
After adding or removing page breaks, press Save or use the Update Page Numbering button to automatically renumber pages and update the Table of Contents page references.
Tags: pagination, paging, page breaks, pages